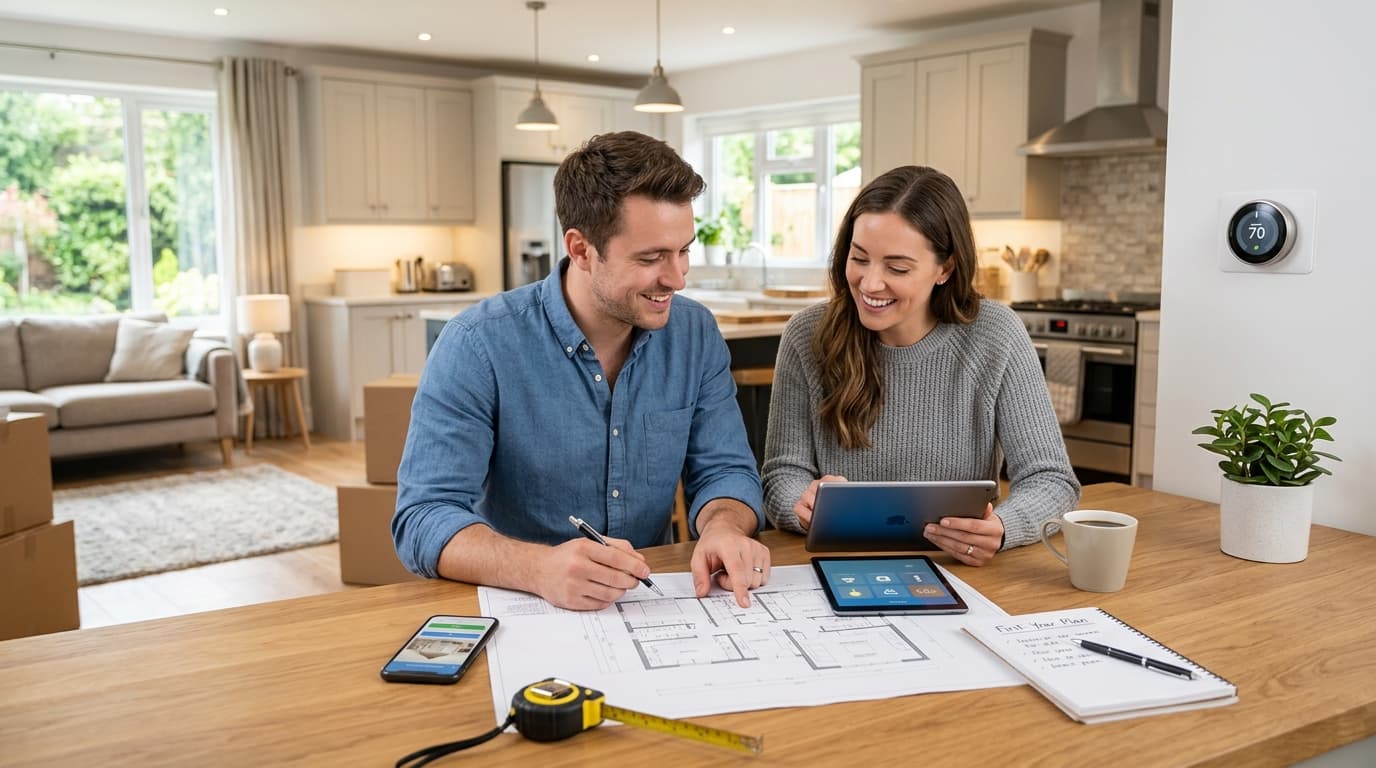
Smart Home Improvement Decisions After Buying a House: Your First-Year Action Plan
You just closed on your dream home, and suddenly you're staring at avocado-green countertops, outdated light fixtures, and carpet that's seen better decades. The excitement of homeownership is now mixed with an overwhelming question: "Where do I even start with home improvement decisions after buying a house?" You're not alone. A 2024 Houzz survey found that the majority of new homeowners feel paralyzed by the sheer volume of choices, especially after inheriting someone else's design preferences and deferred maintenance.
The pressure is real. Your well-meaning relatives have opinions about everything. Your friends are sharing Pinterest boards. Meanwhile, you're worried about making expensive mistakes that you'll regret for years. This guide walks you through exactly how to prioritize, plan, and execute home improvements during that critical first year without draining your bank account or your sanity.
Why Your First Year of Home Improvement Decisions Matters Most
The first twelve months in your new home set the foundation for everything that follows. This isn't just about aesthetics or comfort. It's about protecting your investment and avoiding costly mistakes that compound over time.
The Hidden Cost of Rushing Renovations
Sarah and Mike bought their 1980s ranch house in March and immediately hired contractors to gut the kitchen. Three months and $45,000 later, they realized they'd created a stunning kitchen that didn't connect well to their dining room flow. They also discovered a foundation issue that should have been addressed first. Now they're looking at another $15,000 to fix problems that proper planning would have prevented.
This scenario plays out thousands of times each year. Rushing into new homeowner renovations means tackling cosmetic issues while ignoring structural or mechanical problems lurking beneath the surface. Homeowners who jump straight into renovations without assessment routinely spend 30-40% more overall compared to those who take a strategic approach, according to the National Association of Home Builders.
The "Live First, Renovate Later" Philosophy
Here's advice that might surprise you: live in your home for at least three to six months before making major renovation decisions. This waiting period feels counterintuitive, but it's invaluable for smart home improvement decisions after buying a house.
During these months, you'll discover how natural light moves through your rooms throughout the day. You'll learn which spaces you actually use versus which ones you thought you'd use. You'll experience how your home handles different weather conditions. That wall you wanted to knock down? You might discover it's the only thing preventing your living room from becoming an icebox in winter.
Track your observations in a simple notebook or phone app. Note things like: "Morning sun makes the kitchen unbearably hot by 9 AM" or "We never use the formal dining room, but we're always crowded in the breakfast nook." These insights become your renovation roadmap.
Prioritizing Home Improvement Decisions After Buying Your House: A Framework That Works
Not all first home upgrades carry equal weight. Some protect your investment, others improve daily life, and some are purely cosmetic. Understanding this hierarchy prevents expensive mistakes and helps you answer the critical question: what to fix first in your new house?
Tier 1: Safety and Structural Issues (Address Immediately)
These are non-negotiable items that put your family or your home's integrity at risk. They might not be glamorous, but they come first, always.
Electrical hazards top the list. If your home inspection revealed outdated wiring, aluminum wiring, or insufficient electrical capacity, this needs immediate attention. Per HomeAdvisor's 2024 cost data, rewiring a 1,500-square-foot home runs between $3,500 and $8,000, but it prevents the devastating cost of electrical fires. Watch for frequently tripping breakers, flickering lights, or outlets that feel warm to the touch. All signal dangerous issues requiring professional assessment.
Foundation and structural problems can't wait. Cracks wider than a quarter-inch, doors and windows that stick, or sloping floors indicate issues that worsen with time. Foundation repairs range from $2,000 for minor crack sealing to $15,000 or more for major stabilization work. Delay compounds the damage and the cost.
Roof problems require swift action, especially if your inspection noted concerns. A roof replacement costs between $5,500 and $12,000 for most homes, but water damage from a failing roof can easily double or triple that figure once you factor in interior repairs, mold remediation, and damaged belongings. If your roof is within three years of its expected lifespan, budget for replacement now rather than gambling on borrowed time.
Plumbing emergencies like active leaks, sewer line issues, or failing water heaters demand immediate response. Water heater replacements run $1,200 to $3,500 depending on type and capacity. Sewer line repairs range from $1,500 to $15,000 based on severity. A small leak can cause thousands in mold damage and structural rot. Note: all cost figures represent national averages and vary significantly by region.
Tier 2: Efficiency and Major Systems (Address Within 6-12 Months)
These improvements protect your investment and reduce ongoing costs, making them smart early priorities even if they're not emergencies.
HVAC system upgrades make sense in the first year, particularly if your system is over fifteen years old or struggling to maintain comfortable temperatures. A new HVAC system costs between $5,000 and $10,000 for most homes, but it can reduce energy bills by 20-40% while preventing the misery of a breakdown during extreme weather. If you're keeping your existing system, schedule a professional inspection and tune-up within the first month. This $150-$300 investment prevents expensive emergency repairs.
Insulation improvements deliver excellent returns, especially in older homes. Houses built before 1980 frequently have inadequate insulation by modern standards. Adding attic insulation costs roughly $1.50 to $3.50 per square foot but can cut heating and cooling costs by 15-25% annually, according to the U.S. Department of Energy. This improvement pays for itself within three to five years.
Window replacements fall into a gray area between necessity and improvement. If your windows are failing (condensation between panes, difficulty opening, visible rot), replacement becomes a Tier 1 priority. If they're simply old but functional, you can delay replacement while addressing other priorities. New windows cost $400 to $1,200 per window installed, so a whole-house project quickly reaches $10,000 to $25,000.
Tier 3: Functional Improvements (Address Within 1-2 Years)
These projects enhance your daily life and help you fall in love with your home, but they won't cause damage if delayed.
Kitchen and bathroom updates top most homeowners' wish lists, and for good reason. According to the National Kitchen & Bath Association, a minor kitchen remodel averages $25,000, while a major renovation runs $65,000 or more. Bathroom remodels range from $10,000 for a basic update to $30,000 for a complete overhaul.
The smart approach? Identify what bothers you most and address those specific pain points rather than gut renovations. Hate your countertops? Replace just those for $2,000 to $5,000. Outdated cabinet hardware and a fresh coat of paint on existing cabinets costs under $1,000 but delivers a surprising visual impact. Save the full renovation for year two or three.
Flooring replacement makes sense when existing floors are damaged, unhealthy (old carpet harboring allergens), or so dated they prevent you from enjoying your home. Costs vary widely: carpet runs $3 to $8 per square foot installed, laminate costs $5 to $10, hardwood ranges from $8 to $15, and tile spans $10 to $20. Consider tackling flooring room-by-room rather than all at once. This spreads costs and lets you live with your choices before committing to the entire house.
Tier 4: Cosmetic Updates (Address as Budget Allows)
These improvements change how your home looks but don't affect function, safety, or efficiency. They're the most flexible and can be DIY projects.
Paint offers the highest return on investment for cosmetic updates. Professional interior painting costs $2 to $6 per square foot, meaning $3,000 to $7,000 for most homes. DIY painting costs just $200 to $500 in materials for the same space. Paint transforms your home from "theirs" to "yours" more effectively than almost any other single improvement.
Lighting updates modernize dated spaces for relatively little money. Swapping out old fixtures costs $100 to $300 per fixture for basic options, with installation adding $50 to $150 per fixture if you hire an electrician. Simple fixture swaps make an excellent weekend project for handy homeowners.
Landscaping and curb appeal improvements help you love coming home each day. Basic landscaping costs $3,000 to $6,000 for a front yard makeover, while DIY approaches can achieve similar results for $500 to $1,500 in materials plus sweat equity. Unlike interior projects, you can tackle landscaping in small chunks: a flowerbed this month, mulch next month, new shrubs in the fall.
First-Month Action Plan for Home Improvement Decisions After Buying
Your first thirty days in a new home set the stage for all future improvement choices. This period is about assessment, not action.
Conducting Your Personal Home Assessment
Professional home inspections catch major issues, but they're limited in scope and timing. Your personal assessment happens over weeks and captures details inspectors miss.
Create a room-by-room punch list by walking through your home with a notebook, camera, and measuring tape. Document everything: problems, measurements, observations, and ideas. Take photos of every room from multiple angles. Organize findings by room and category, noting immediate concerns, potential future projects, and questions to research. For example: "Master bedroom: ceiling fan wobbles (fix soon), south wall gets hot afternoon sun (consider insulating blinds), closet organizer needed (low priority)."
Test everything systematically. Run every faucet and flush every toilet. Test every outlet with a plug-in tester ($5 at any hardware store). Turn on every light switch and try every appliance. Check every door and window for smooth operation. Run your HVAC system in both heating and cooling modes.
Investigate the attic, basement, and crawl spaces thoroughly. These areas harbor issues that impact your entire home. Look for signs of water intrusion, inadequate insulation, pest activity, or structural concerns. Take photos and measurements of mechanicals like HVAC equipment, water heaters, and electrical panels.
Building Your Home Improvement Budget
Financial planning separates successful renovations from regrettable ones. Most financial advisors recommend allocating 1-3% of your home's value annually for maintenance and improvements.
Create separate budget categories for different types of work. Your emergency fund should cover unexpected repairs like a failed water heater or sudden roof leak. Keep $3,000 to $5,000 as an adequate cushion, separate from your regular savings.
Establish a realistic timeline that aligns with your budget. If you're saving $500 monthly for improvements, that's $6,000 annually, enough for several moderate projects or one significant upgrade. A $25,000 kitchen remodel requires either four years of saving at this rate, financing, or a combination of both.
Research specific financing options before you need them. Home equity lines of credit (HELOCs) through lenders like your current mortgage servicer offer flexibility, with interest rates typically 2-3% above prime rate. Personal loans through credit unions or platforms like SoFi or LightStream work for specific projects. Cash-out refinancing makes sense when you can secure a lower overall mortgage rate while pulling equity. For insights on managing multiple home projects and their associated costs, using home maintenance management apps can help you track expenses and stay organized.
Finding and Vetting Contractors Early
Even if you're not ready to start projects, identifying reliable contractors during your first month pays enormous dividends later.
Start building your contractor network before you need urgent help. Ask neighbors with well-maintained homes for recommendations. Join local Facebook groups or Nextdoor communities where residents share contractor experiences. Drive around your neighborhood and note company names on trucks at active job sites.
Interview contractors with specific questions. For each trade you'll eventually need (general contractor, electrician, plumber, HVAC technician, roofer), ask: "What's your license number so I can verify it?" "Can you send your certificate of insurance directly from your insurer?" "What's your typical deposit structure?" and "Can you provide three references from projects completed this year?" These conversations reveal which contractors communicate well, show up on time, and seem trustworthy.
Verify credentials through specific tools. Check license status through your state's contractor licensing board website (search "[your state] contractor license lookup"). Verify insurance by requesting certificates directly from the contractor's insurer, not from the contractor. Search reviews across Google, Yelp, and the Better Business Bureau. One bad review might be an outlier, but patterns reveal character.
At Homeplexi, we've processed thousands of contractor matches and see the same three mistakes burn homeowners repeatedly: paying deposits over 25% of project cost before work begins, agreeing to change orders verbally instead of in writing, and hiring contractors who can't produce a verifiable insurance certificate on request. Contractors who pull permits also generate far fewer first-year complaints in our data than those who skip them. If vetting contractors feels overwhelming, our contractor-matching service handles credential verification and competitive quote gathering so you don't have to start from zero.
Tackling Inherited Design Choices: When to Change and When to Wait
One of the most challenging aspects of making home improvement decisions after buying a house involves dealing with the previous owner's taste. That bright purple accent wall or the carpeted bathroom might make you cringe, but not everything requires immediate action.
The Psychology of Making a Home "Yours"
There's genuine psychological value in personalizing your space, but there's also danger in changing things simply because they're not what you would have chosen. The key is distinguishing between changes that improve your daily life versus changes driven purely by aesthetics.
Ask yourself three questions before changing inherited design elements: Does this feature harm my daily function or enjoyment of the space? Will changing this provide value proportional to its cost? Can I live with this for another 6-12 months while I observe how I actually use the space?
If you answer "yes" to the first two and "no" to the third, you've identified a legitimate early priority. If you answer "no" to the first two, you're better off waiting regardless of how you feel about the feature aesthetically.
Quick Wins That Make a Big Psychological Impact
Some changes deliver outsized emotional returns for modest investment. These "quick wins" help you bond with your home without breaking the bank.
Paint transforms spaces faster and more affordably than any other improvement. That dated mauve living room becomes your serene retreat with $150 in paint and a weekend of work. Focus on the rooms you use most: primary bedroom, living room, and kitchen.
Hardware updates modernize kitchens and bathrooms remarkably well. Replacing dated cabinet pulls and drawer handles costs $3 to $10 per piece, usually $150 to $400 for an entire kitchen. Updating door hardware (knobs and hinges) throughout your home costs $300 to $600 but eliminates that "rental property" feel that mismatched, worn hardware creates.
Light fixture swaps change the entire character of a room. That brass chandelier from 1987 might be perfectly functional, but it screams "previous owner." Modern fixtures start around $50 for basic options and run to $300 or more for statement pieces.
Landscaping cleanup dramatically improves curb appeal and your daily experience arriving home. Trimming overgrown shrubs, removing dead plants, adding fresh mulch, and planting seasonal flowers costs $300 to $800 in materials for most properties.
Professional Design Help Worth Considering
If you lack confidence in your design abilities, professional help doesn't always mean expensive interior designers. Several options exist at different price points.
Design consultations offer professional guidance without full-service costs. Designers on platforms like Havenly or Modsy offer 2-4 hour consultations for $200 to $500, during which they assess your space, discuss your preferences, and provide actionable recommendations. This investment helps you avoid expensive mistakes like choosing wrong paint colors or creating awkward layouts.
Full-service interior design makes sense for major renovations. Designers charge 10-20% of project costs or $100 to $200 per hour. While expensive, good designers save you more than they cost by preventing mistakes and negotiating better contractor pricing.
Managing Multiple Projects Without Losing Your Mind
Sequencing matters enormously for home improvement decisions after buying a house. Few homeowners tackle just one project in their first year. More commonly, you're managing several improvements simultaneously while living in the chaos.
The Art of Project Sequencing
The order in which you tackle improvements dramatically affects both costs and stress levels. Poor sequencing means doing work twice or damaging completed projects with subsequent work.
Work from top to bottom and inside to outside as a general rule. Roof repairs come before interior ceiling work, which comes before wall repairs, which comes before flooring. This prevents damage from ongoing work affecting completed projects.
Group projects by contractor when feasible. If you're hiring an electrician to update your kitchen lighting, have them also install that ceiling fan in the bedroom and add outlets to your home office during the same visit. Most contractors charge less per task when handling multiple items in one trip. You'll save 20-30% on labor costs through this approach.
Consider seasonal factors in your planning. Exterior painting, roofing, and landscaping work best in mild weather. HVAC replacement should happen during shoulder seasons (spring or fall). Interior projects can happen year-round but are more comfortable during extreme weather when you're less tempted to be outdoors.
Creating a Project Management System That Actually Works
Professional contractors use sophisticated project management tools, but homeowners need something simpler and more flexible.
Use a dedicated tool to track all projects, contractors, costs, and timelines. Notion offers free home project templates with columns for project name, priority level, estimated cost, actual cost, target completion date, contractor name, and status. Airtable works similarly with more database-like functionality. Even a shared Google Sheet beats tracking projects in your head. Update weekly, and you'll always know where you stand financially.
Maintain a project binder or Google Drive folder with all documentation for each improvement. Include contracts, receipts, before-and-after photos, warranty information, paint colors and product specifications, and contractor contact information. This becomes invaluable for future work, warranty claims, insurance purposes, and eventual home sale.
Schedule biweekly check-ins with yourself or your partner to assess progress and adjust plans. Review your project list, budget, and timeline. Celebrate completed projects. Adjust priorities as needed. Your improvement strategy isn't static; it evolves as you learn more about your home and your needs.
Setting Realistic Expectations for Timeline and Budget
Nearly every home improvement project takes longer and costs more than initially expected.
Add 20-30% to contractor time estimates for a realistic completion date. A project quoted at two weeks will likely take 2.5 to 3 weeks due to weather delays, material delivery issues, or unexpected complications. This buffer prevents disappointment and helps you plan around disruptions more accurately.
Budget an additional 10-20% beyond quoted costs for most projects. Unexpected issues arise once walls are opened or old materials are removed. That simple bathroom update reveals water damage. The kitchen renovation uncovers electrical work that doesn't meet current code. These surprises are normal, not signs of contractor incompetence. For detailed cost planning guidance, our home renovation cost estimator guide helps you budget like a pro.
Communicate with contractors using specific language. Instead of vague "how's it going?" check-ins, ask: "Are we still on track for the completion date we agreed on?" and "Have you encountered anything that will change the scope or cost?" Request all change orders in writing with exact dollar amounts before approving them. Address concerns the day they arise rather than letting them build.
Common First-Year Mistakes and How to Avoid Them
These mistakes cost homeowners thousands annually. Learning from others' errors is cheaper than making your own.
Mistake #1: Depleting Your Emergency Fund for Renovations
The temptation to use your emergency savings for home improvements is powerful. Resist it. When your HVAC system dies in July or your water heater floods the basement, you'll need $3,000 to $8,000 immediately. Without emergency funds, you're forced into high-interest credit card debt or predatory contractor financing.
Maintain at least $5,000 in home emergency funds separate from your general emergency savings. Replenish this fund immediately after using it, before funding other improvement projects.
Mistake #2: Hiring Based Solely on Price
The lowest bid is rarely the best value. Contractors bidding significantly below competitors cut corners, use inferior materials, lack proper insurance, or plan to hit you with change orders that bring the final cost above other bids.
Get at least three bids for significant projects and be suspicious of outliers on either end. The middle bids represent fair market value from competent contractors. Make your decision based on contractor credentials, communication quality, references, and your gut feeling about trustworthiness rather than price alone.
Mistake #3: Ignoring Permits and Building Codes
Skipping permits to save money creates problems that surface years later. Unpermitted work complicates home sales because disclosure laws in most states require revealing unpermitted improvements. Buyers demand permits be obtained retroactively (expensive and sometimes impossible) or negotiate steep price reductions.
Insurance claims may be denied if damage involves unpermitted work. Your deck collapses and injures someone? If it was built without permits, your homeowner's insurance might deny the claim, leaving you personally liable.
Obtain required permits even when contractors suggest skipping them. Permit costs are modest, typically $150 to $500 for most residential projects. The protection they provide far exceeds this cost.
Mistake #4: Trying to DIY Beyond Your Skill Level
DIY projects save money and provide genuine satisfaction when they match your abilities. But overestimating your skills leads to dangerous situations and expensive professional fixes.
Be honest about your capabilities across three dimensions: technical skill, available time, and physical ability. Start with low-risk projects to build confidence: painting, simple landscaping, installing hardware, and basic fixture replacement.
Call professionals for electrical work beyond simple fixture swaps, plumbing involving main lines or gas lines, structural modifications, roofing, and HVAC work. These areas involve significant safety risks. For realistic guidance on which projects make sense for different skill levels, see our guide on DIY home improvement money-saving tips.
Mistake #5: Renovating for Resale Instead of Your Needs
Unless you're planning to sell within two years, renovate for yourself first. You'll live with these decisions daily for years. That trendy gray-and-white color scheme might appeal to future buyers, but if you prefer warm, colorful spaces, you'll resent your home every day.
Focus on improvements that serve both purposes. Quality kitchen and bathroom updates provide daily enjoyment while appealing to future buyers. Energy efficiency upgrades reduce your bills while attracting environmentally conscious buyers. But avoid over-improving for your neighborhood. If surrounding homes sell for $250,000 to $300,000, investing $100,000 in renovations that bring your home's value to $400,000 means you'll never recoup that investment.
Creating Your Personal Home Improvement Roadmap
With all this information, you're ready to create a concrete plan for your first year and beyond.
Your 12-Month Home Improvement Timeline Template
Months 1-3: Assessment and Planning Phase
- Complete your room-by-room home assessment
- Address any immediate safety issues discovered
- Research and interview contractors for future projects
- Create your detailed budget and project priority list
- Make quick cosmetic changes (paint, hardware, lighting)
- Schedule professional inspections for major systems if not done during home purchase
Months 4-6: Foundation and Systems Phase
- Address Tier 1 structural and safety issues
- Schedule HVAC inspection and maintenance
- Complete urgent repairs to roof, foundation, or major systems
- Begin saving for larger planned projects
- Tackle DIY projects that improve daily function
Months 7-9: Major Improvement Phase
- Begin first major renovation project if budget allows
- Address efficiency improvements like insulation or window replacement
- Complete exterior projects while weather permits
- Continue building emergency fund and improvement savings
Months 10-12: Refinement and Reflection Phase
- Complete ongoing projects
- Address issues discovered during previous work
- Evaluate what worked well and what you'd do differently
- Plan year-two priorities based on year-one learnings
Adjusting Your Plan When Life Happens
No plan survives contact with reality unchanged. Job changes, family additions, unexpected repairs, and shifting priorities all require flexibility.
Review and revise your plan quarterly rather than treating it as fixed. Some projects will prove more urgent than anticipated. Others will become less important as you live with them. These adjustments aren't failures. They're smart adaptations to new information.
Build flexibility into your budget by maintaining that 10-20% cushion discussed earlier. This buffer absorbs unexpected costs without derailing your entire plan. It's the difference between a surprise $2,000 expense being an inconvenience versus a crisis.
Your Next Steps: Taking Action This Week
You've absorbed a lot of information. Now it's time to translate knowledge into action with specific, manageable steps.
This week, complete these five tasks:
-
Schedule two hours for your home assessment walkthrough. Put it on your calendar as a non-negotiable appointment.
-
Set up a project tracking board in Notion, Airtable, or Google Sheets with your initial observations and ideas.
-
Request recommendations for contractors in key trades from neighbors, friends, or online community groups.
-
Calculate your realistic home improvement budget based on your income, savings, and financial goals.
-
Identify and complete one quick-win project that will help you feel more at home in your space.
Next month, build on this foundation:
- Interview at least three contractors for trades you'll need
- Prioritize your project list using the tier system outlined in this guide
- Address any immediate safety or structural concerns
- Begin saving systematically for planned improvements
- Join online communities where you can learn from other homeowners' experiences
Ready to organize your home improvement journey? The framework in this guide helps you prioritize projects, avoid costly mistakes, and tackle improvements strategically. By following the tier system and timeline template, you'll transform your house into your dream home without the financial stress and regret that plague homeowners who rush into renovations.
The journey of transforming a house into your home is a marathon, not a sprint. Every small step forward is progress worth celebrating. You've got this.
Related Articles:
- Smart Homeowner Decision Making Advice: Confident Choices on Major Home Investments
- The Hidden Problems When Buying an Old House: A Complete Guide to Avoiding Costly Surprises
- How to Find a Reliable Contractor: 7 Red Flags to Watch For
- The Complete Home Renovation Cost Estimator Guide: Budget Like a Pro in 2026
Need Professional Help?
Homeplexi connects you with vetted contractors, helps you compare quotes, and manages your entire home improvement project in one place.
Get Started Free →Important Safety Disclaimer
Please read this carefully before following any advice:
- Always prioritize safety: Wear appropriate protective equipment (safety glasses, gloves, etc.) when performing any home maintenance or repair work.
- Know your limits: If you're not confident in your ability to safely complete a task, hire a licensed professional. This is especially important for electrical, gas, plumbing, and structural work.
- Verify all information: The guidance provided here is based on community discussions and general knowledge. Always double-check any advice with multiple reliable sources or a licensed professional.
- Follow local codes: Building codes, electrical codes, and plumbing codes vary by location. Ensure any work complies with your local regulations and obtain necessary permits.
- Turn off power/water/gas: Before working on electrical, plumbing, or gas systems, always shut off the relevant utilities at the source.
- For emergencies: If you have a gas leak, electrical fire, major water leak, or other emergency, evacuate immediately and call emergency services (911) and your utility company.
Liability: Homeplexi provides information for educational purposes only. We are not responsible for any injury, property damage, or losses resulting from following any guidance or advice provided through this platform. Use all information at your own risk.
When in doubt, always consult a licensed, insured professional contractor. Homeplexi can help you find qualified professionals in your area.
Found this helpful? Share with others:
Related Articles
How to Lower Electric Bills: Proven Strategies That Actually Work When Basic Tips Fail
Electric bills climbing higher than expected despite energy-saving efforts
Electrical Outlet Not Working: DIY Fixes vs. When to Call an Electrician
Knowing when it's safe to DIY vs. hiring a pro
Home Repair Priorities: The 4-Quadrant System for Deciding Which Fixes Come First (When You Can't Afford Everything)
Homeowners overwhelmed by multiple needed repairs but limited budget, unsure which repairs to tackle first